Misty Fuse:
Securing Bra Layers
April 4, 2017
Misty Fuse is fusible web that is shear, light and offers many uses to bra makers. This great product is found at Bra-Makers Supply Inexpensive and easy to use, once you put it to your test, you will wonder how you got by wihtout it.
I have been lining my cups with cotton knit and decided to see how well it would work to use the Misty Fuse to hold the cotton lining to the inside of the bra cup. I share my experience here.
It worked great with some simple instruction. Start with the bra cup padding or lining pattern. Fold the Misty Fuse so you have two layers and pin the pattern in place over the Misty Fuse. Cut along pattern cutting line.
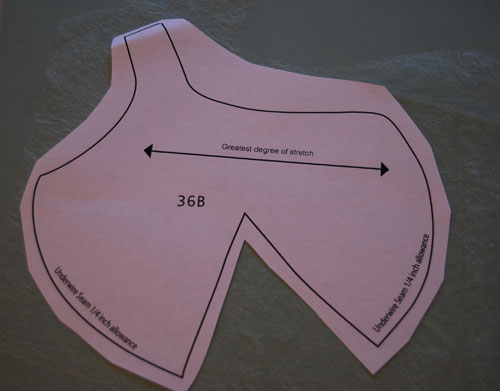
Misty Fuse is sheer and difficut to see to cut out, it takes a little practice.
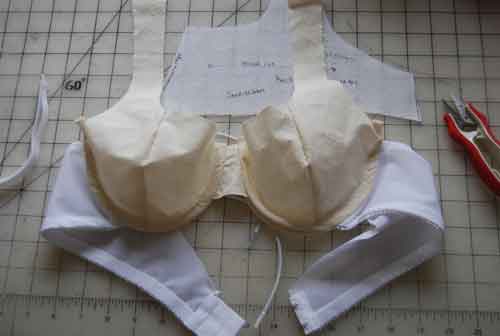
Remove from pattern, place each cut out piece of Misty Fuse over the inside cup padding, you may do this before you sew the dart seam closed. I show it done here after it was sewn. See image 2 below, note the pins on the outside of the cup.
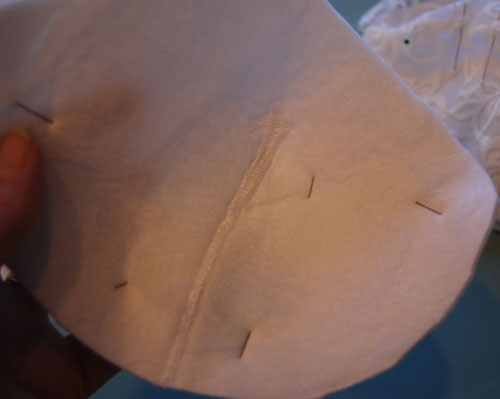
Pins are on the outside of the cup holding the Misty Fuse in place.
Turn the cup inside out and lay the lining over the foam cup with the Misty Fuse seated between.
Pin in place keeing the fusible web flat and in place.
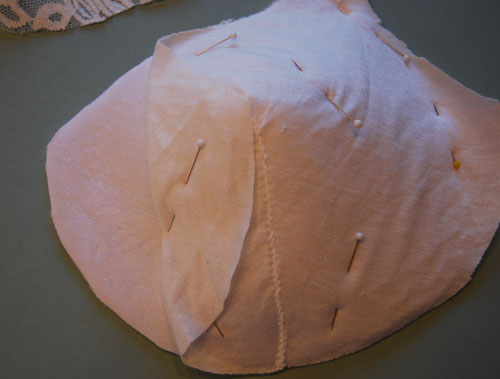
Cup is pinned with Misty Fuse sandwiched between the lining and the padding.
Heat your iron to a medium to low setting. Alwats test your the iron with a fabric sample to find your desired setting. A pressing cloth will protect the fabrics and can be used if you like for additonal protection.
See image below for example.
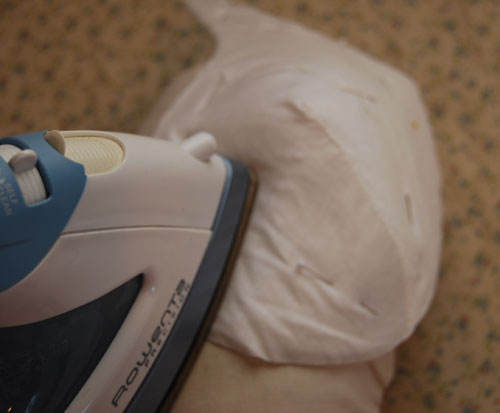
Heat melts the Misty Fuse and allows it to bond the layers
Continue to iron the entire cup area securing the layers and easing out the wrinkles. The cup layers should be melded togehter and not shift around or lift.
Continue with your bra making process. I add foldover elastic to the neck cup edge and baste the underwire edge of the cup with a 4 or greater size stitch to give the layers additonal support.
The lace is placed over the foam cup. Stretched tighly is is smooth, flat and secured.
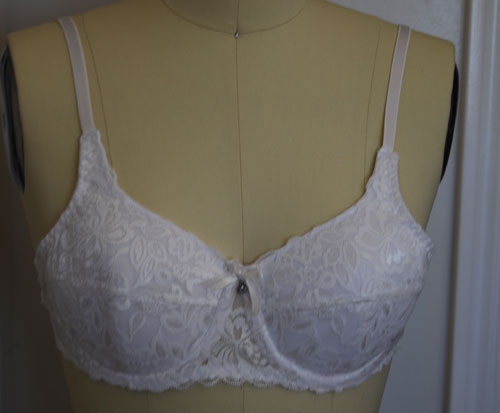
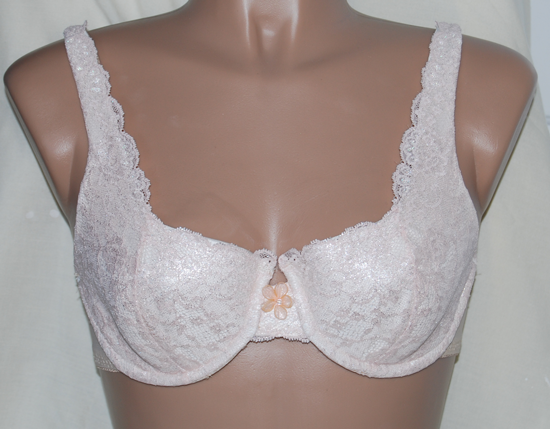
My new bra using the Alana Bra pattern which is due out this summer for sale.
Bra Padding... What's it all about?
May 14, 2016
Ever wonder about those pads that line most bras? I watched a video that showed a bra pad being stretched and formed using tools and a heat source set up for the exact form planned. It was interesting and informative. I don't have anything like that laying around my home to form padding in that way.
What is all the hype about anyhow? Why use foam or pads at all especially if you are endowed and don't want to add to your size?
Padding can be a great asset to any size bra. There are exceptions to every situation. But perhaps if you are wondering, it might not hurt to see what they can do for you. Bra padding variety differs from one brand to another.
Shown here in the image below are some of my stash. I have tried most of them and some I have designed from foam using my bra pattern.
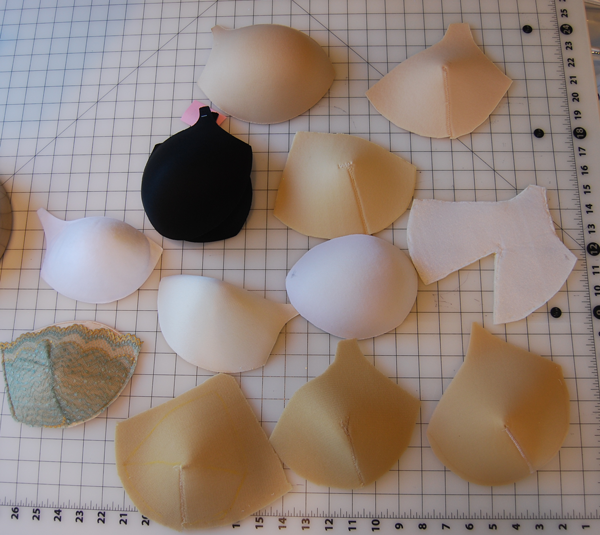
Shown here are a combination of purchased ready to use pads along with my own pattern variations.
My findings range from the local fabric stores to special order from internet stores that sell bra materials. I find them to be as standard as the patterns. But I have gained a huge understanding of why padded ready to wear bras don't fit me. I have to conform to the size, while my size is pretty close to a standard, there are a few things that ruin ready to wear bras for me.
It's only natural that after making quite a few bras without padding that I would try my hand at adding padding. This is my saga and what I have learned.
There are three excellent foam padding types that are inexpensive and are of great quality. The first which is my favorite is found at Bra Maker's Supply - Dyeable White Foam Padding, shown in the photo above with the seam or dart unsown. it is appro. $25.50 for a yard. Out of which you can get many pairs of cups. Compared to the price of $7.00-$9.00 per pair of molded cups.
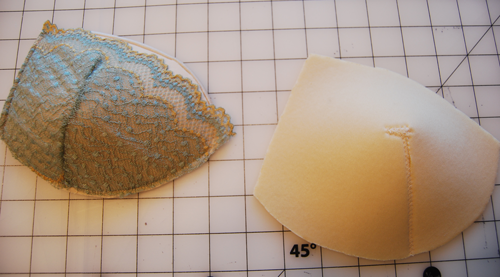
Shown above are two cups made out of foam padding
I have had great success molding and creating my own foam cups. The padding gives the cup great shape and form without adding bulk or enlarging my cup size. The bras feel stronger and seem to last longer.
Bra Maker's Supply also carries Pre finished foam padding in many different colors for appro. $25.50 a yard. A soft but yet durable material that gives perfect form to the cup. A great choice, and a great value in my experience.
The swimsuit foam is designed to be lightweight and moldable. It is priced less at $12.75 per yard. I would highly recommend this padding.
Molded pre made swimwear cups are available for purchase also. Priced similar to pre made foam bra cups.
The second type of padding is called Poly laminate foam, sold on line from Sew Sassy . Priced at $17.50 per yard. They offer black, white and tan.
The third foam padding is stocked by the Fabric Depot. An online store based in Texas with a site full of great lycra fabrics for swimwear and yoga wear. They also offer pre made foam cups for both bras and swimwear. Their version of the padding is offered in the 1/2 yard and full yard. The most expensive of the three suppliers found on line at $28.00 for a full yard.
I have used the padding from all three of the online stores I mention here. Any one of them would be acceptable and give a great finished product. Pre made bra foam cups vary in so many ways that it would be impossible and very expensive to do a test analysis of all the cups currently sold on the internet and in local fabric stores. My advice is to question some specifics:
- Do the cups have addtional padding built in for bust enhancement?
- How are the sizes gauged, underwire edge or cup? Can you get close to you cup size and still use your underwire size?
- Does it specify what the cup should be used for, i.e., Swimwear verses Bras.
- Does it list the fabric ingredients, (Looking for allergies to latex or other man made products added).
Foam padding is easy to use and very functional for most formed cup needs. Be open and give it a try. You may just find the change you are seeking.
Testing Bra Fit
-Sew a Muslim
February 7, 2016
I recently saw a post in my bra making supply searching that showed using muslin to test a mock up bra pattern. I love sewing bras and I have sewn quite a few from the basic one piece pattern I designed for my students and myself.
So last summer I created a new bra pattern using another great tutorial I found. The pattern has morphed into a two piece pattern with a horizontal seam instead of the usual vertical seam seen on many bras. I drew out a sketch of a bra design I like.
How did I get here? You wonder?
It started the day I found Bra Maker's Supply. I used a purchased bra pattern from 'StretchNSew'. It, unfortunately didn't fit and after hours spent trying to alter and re-size the pattern to fit me, I gave up and designed my own pattern.
Aha, I said to myself. The same struggle I had with fitting sewing patterns was now my bra making recurring nightmare.
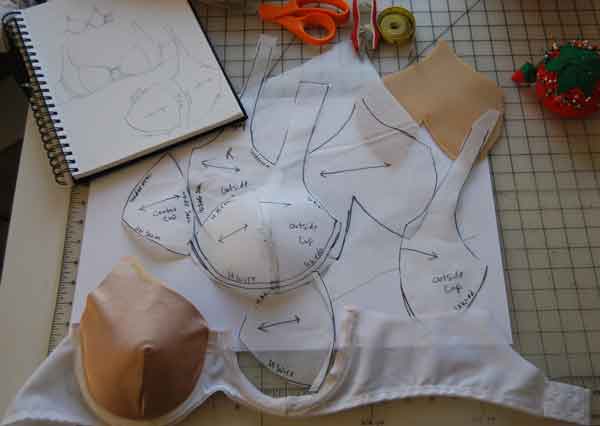
Pictured here are some of the pattern changes I made along with my drawing of the new bra.
The bra pattern pictured above was designed from a free pattern making blog post. After some trial and error, I finally got the pattern to actually fit. I used my personal testing band to fit the cups for size and get the padding adjusted and shaped to give the pattern a style that I like.
Any and all pattern changes and fit adjustment trials are easy to sew with muslin. This is regular muslin sold in fabric stores or through online stores.
I used a bra fabric for the initial full band pattern.
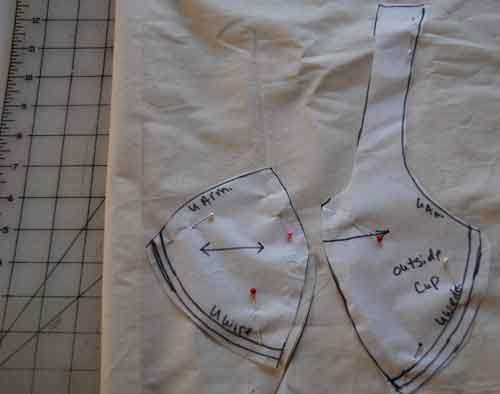
The bra cup pattern placed on the muslin ready to cut out.
I have three seams for the underwire edge. The bra pattern can go into a full band or a partial band. The seam would be cut out 3/8" larger for the partial band bra cup. And would need to be tested.
My experience has shown that changing to the partial band can truly effect the fit of the cup. Thus the reasoning behind testing the actual fit using the muslin fabric and a testing band or side wings that make up the band.
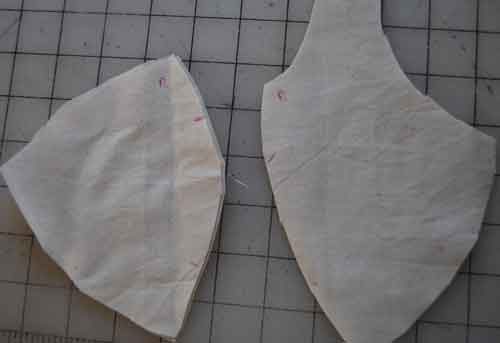
Below are the cups cut out of muslin with markings on right sides, underwire edge and the center seams for easy matching and sewing. At this stage they must be well marked or it is easy to confuse the sewing process.
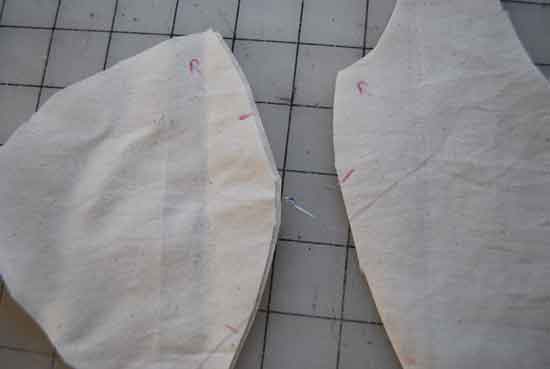
Pin and sew the cup pattern pieces together using strategic markings that are clear and easy to follow.
The marks placed on the muslin cups are clearly seen here.
Match all seams and sew the cups pieces together using a 1/4" seam. I usually baste the cups at this stage.
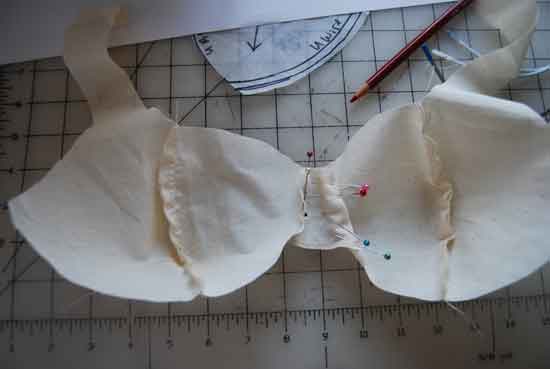
Note the bridge pinned at this stage, baste it to both cups.
Sew the back bands, the underwire channeling, add straps, and insert underwires to test the fit.
This bra is ready for some serious seam changes and fixing small fit issues to be sure the lace bra will fit well.
Being able to have the bra completely sewn offers a true look at the fitting issues and where the seams fit the bust. I expect a lot from the simulated bra at this point. I made four changes to this pattern marking changes right on the fabric before I felt confident to make it using my expensive bra fabrics.
Check out the final bra made from the pattern with all the new changes made using the muslin for fitting and pattern changes.
Now I can see how it looks in lace and adjust the underwire, the bridge, or any other style options I want to change and be secure in making simple adjustments, since the fit is spot on.

