
Fit and Style for Jeans
The Five Lessons I Learned making "Carolyns Cargo Pant"
May 24, 2020
Does a great pants or jeans pattern elude you? Are you seeking some fun style and something new in a jeans pattern? Are you frustrated with how to add design elements, found in great ready to wear pants, to your fitted pant pattern? You might want to read on.
Home sewing is changing. We are on the cusp of a new horizon. The internet offers infinite options for patterns and sewing DIY’s.
The rules that guide the industry are being offered by a variety of blogs and vlogs. Numerous options for instruction on pattern making and design inspiration are found in huge volume.
Wading through the huge flow of information, to break it down, and use, takes time. But can prove to be difficult even with all this option and knowledge. Turning to well designed patterns can bridge this gap.
In this post I offer a some insight to making a cargo pant, in the lessons I learned sewing and fitting “Carolyn’s Cargo Pant”, a pattern from the Silhouette line by Peggy Sagers. Pictured below:

A purchased pattern offered by "Silhouettes Patterns"
I have followed Peggy Sagers for a few years and
purchased fabric and patterns from her company. She offers great videos and is the host and producer of "Fit2Stitch", a PBS video education series.
I was elated to find this pattern.With great design that is hard to find in a home sewing pattern. I had to buy it and try it out. And I want to share what I learned in the process.
My first lesson: Start with the right pattern.
I chose this pattern for the design style of the cargo pants. The color on the pattern front drew me in. But the style effects of a cargo pant are all there in a straight leg jean pattern. The pattern is drafted for all levels of sewing experience. There are also added fitting features built into the style seams.
Peggy Sagers uses finished garment measurements instead of body measurements. It is a new and amazing way to determine the proper size needed to purchase.
She did a complete sew-a-long video for these pants in a jeans tutorial. Click here for the actual You tube video tutorial: "Silhoette Patterns Jeans Sew-n-Chat".
I watched this video a few times and found she does a great job of showing the process. I highly recommend watching it.
My second lesson: Choose the right fabric.
On line fabric stores offer a variety of denim fabrics in many colors. Knowing the stretch and weight will help to determine the right fabric for this pant. Buy enough for the muslin, if you need to.
I found my fabric (below) at JoAnn’s. The rust color is difficult to find and is seasonal. Though I have run into many options of this color offered at times.
 The fabric swatch is 7oz denim with 70% cotton, 30% polyester and 5 % lycra. It is perfect for this pattern. The fabric is out of stock presently. But there are many other fabric options with the same weight that would work just fine.
My third lesson: Make a new muslin. I used my standard jean pattern to create the best fit. Then determined the measurements on the pattern that coordinated with my muslin to find the correct size the for the cargo pant pattern.
Any pattern for a pair of fitted jeans or close fitting pants will do. I left off the pockets, cut the pattern to my established waist where I like my jeans to sit. I used a muslin fabric with the same stretch value, drape, and weight I planned to use for my cargo pants.
My forth lesson: Compare style changes with muslin pattern.
The sewing directions for this pattern are straight foreword and easy to follow. Fitting the pattern pieces with the muslin pattern appears complicated.
There are some simple steps to simplify this process.
Take out all the pattern pieces cut them out and establish the hip size based on the directions for sizing that come with the pattern.
One option, is to use the measurements of existing garments or the width of your waist and hips measured in your muslin pattern then fit into a size that coordinates with the pattern and the end goal for your fit.
Be sure to add in your seam allowances since the pattern is sized with seam allowances added in.
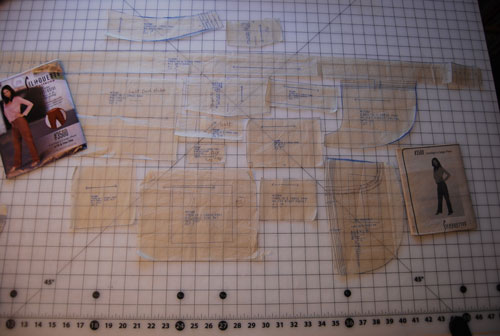
Pictured above: Style pattern pieces cut out.
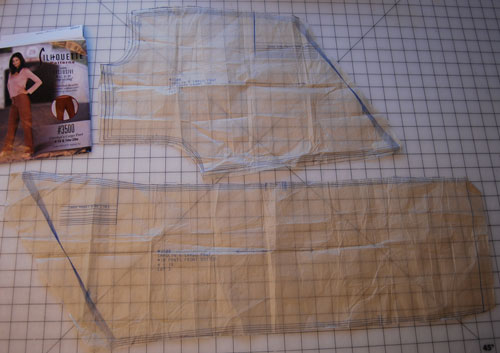
This is the front pattern cut out and ready for sizing.
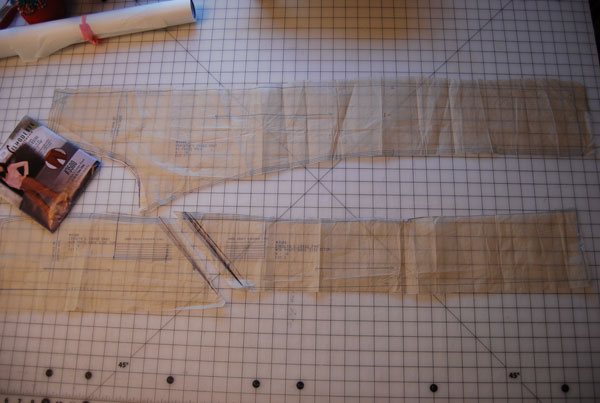
This is the back pattern cut out and ready for sizing.
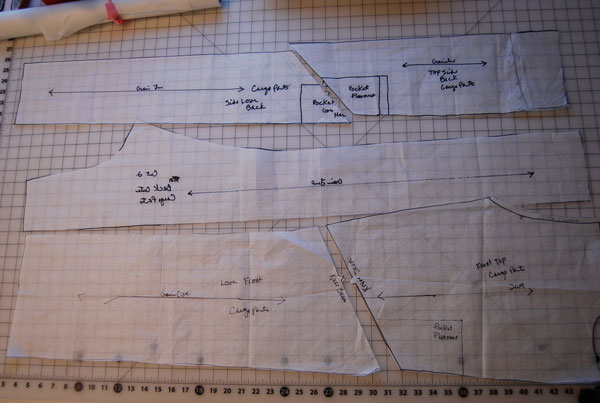
This image is the adjusted pattern using my muslin and the cargo pant details . Th style lines drawn and cut. Seams are included.
My fifth and final lesson: Look over all style pattern pieces. Determine correct size and placement for all pocket pieces. I was so excited to have a pattern which used welt pockets in the back.
I was somewhat disappointed to learn the markings for the welt pockets are not given in the pattern.
To determine where they would look best, I started with a pair of pants with this type of pocket. I basted the pants together then pinned the welts in place to test the placement. When I was satisfied I took the pants apart and used that same pant to create my welt pocket pattern.


I found this pattern challenging, chock full of complicated details, with great directions, that were actually easy to follow. The construction was straightforward and fun to do. Making this pattern great for all sewing levels. The end result is a perfect pair of cargo pants, that no one would say were "home made".
I do plan to make another pair at some point. Until then, I will take these lessons into future pant projects. Thanks for checking out my blog. I hope you found something of interest. My goal is to share what I learn as so many have shared with me. Look for my next post "Ready to Wear Inspiration: Finding Look Alike Patterns.
